“How-to” time! This was going to be a swap for a craft meet up I’m going to in a couple of weeks, but I ended up deciding on something else… ooo mysterious.
You will need:
- A single piece of cardstock cut down to 3 1/2 x 6 inches
- Two cuts of decorative paper (DSP) (2 x 2 1/4 inches.. then take off a tickle)
- Ribbon (13 inches)
- Single mini hole punch – or something to poke a hole with 🙂
- Glue – I used Tombow Mono liquid glue
- Flat lollipops! I found a ton of these on Amazon for a good price
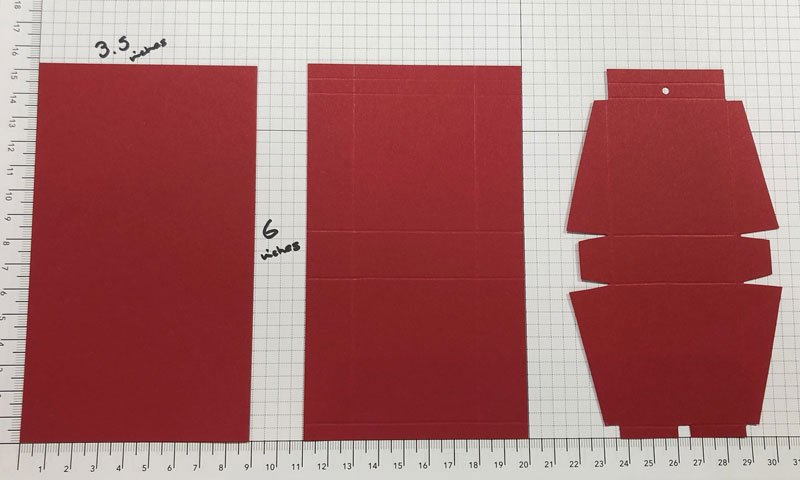
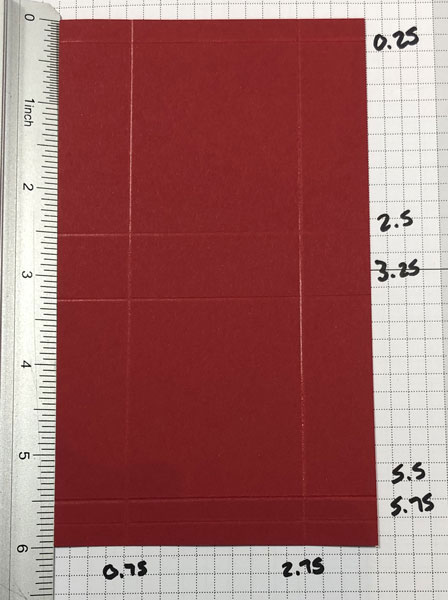
Score on the long side at 1/4, 2 1/2, 3 1/4, 5 1/2 and 5 3/4 inches.
Score on the short side at 3/4 and 2 3/4 inches.
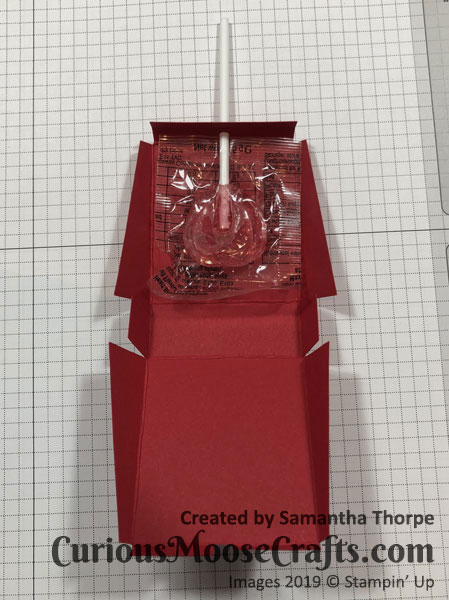
Cut as shown and burnish the score lines well.

Punch a hole in the centre on the 2nd little strip section (below the glue section) and put the lollipop in.
Glue the very top and sides then fold together. Hold until the glue is secure! Using liquid glue gives you a grace period to readjust and make sure you have everything lined up well. Just don’t overdo it or you’ll make the cardstock buckle. A little goes a long way with a decent glue (such as Tombow).
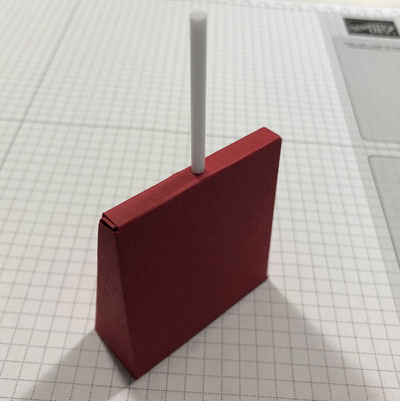
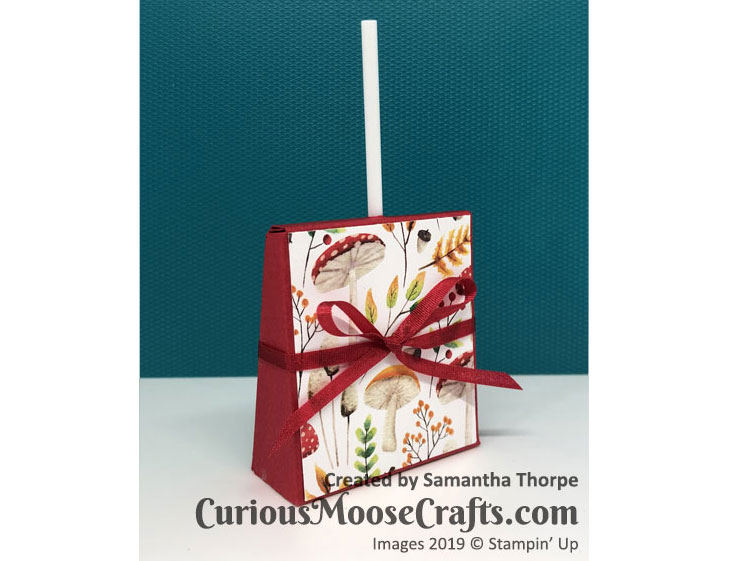
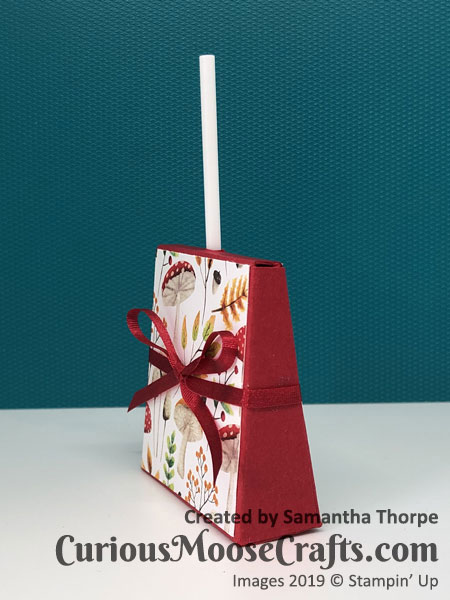
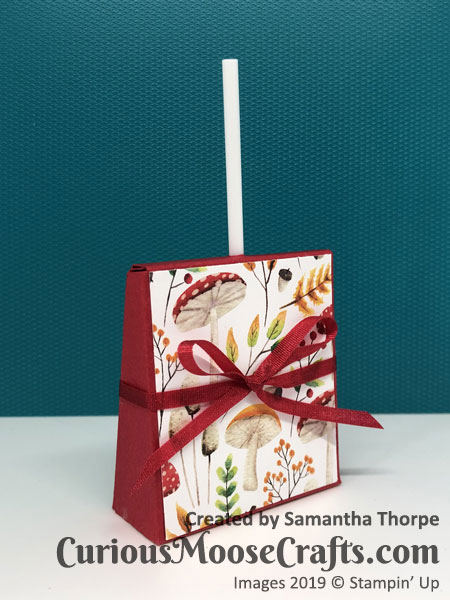
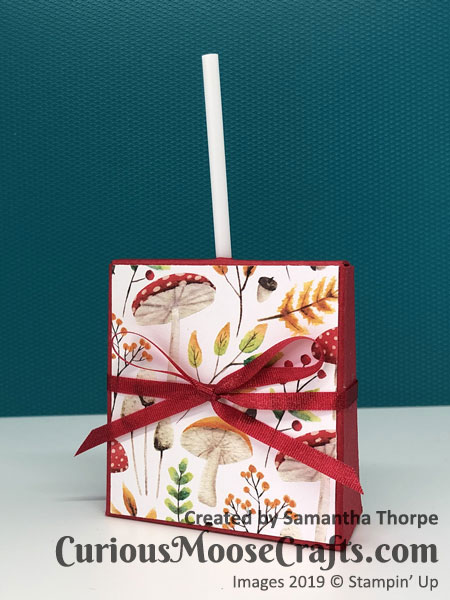
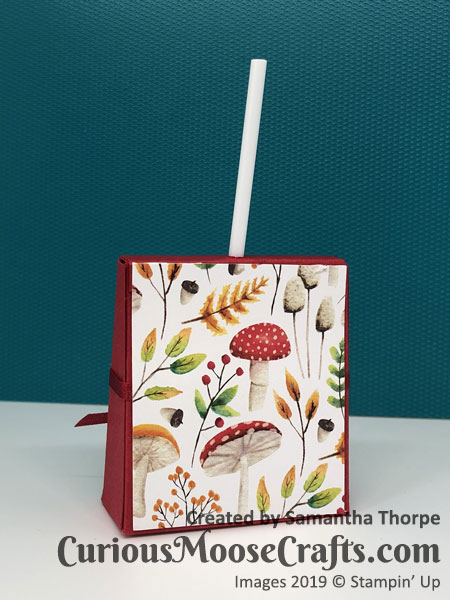
You should now have your wrapped freestanding lollipop cover ready to decorate!
I stuck a piece of DSP to the front first, then tied the ribbon around and then attached the back piece of DSP.
You… can do what you like! 🙂 Enjoy prettying them up.
I think the solid standing element makes them nice favours for a wedding or to add a decorative element to a food table at a party.

