
What colours of ink do I have? Do they stamp the same colour as the packaging? Which colours go together?
These are questions that were nagging at me. I saw some ideas on Pinterest and from Stampin’ Up! where co-ordinating colours have been matched together and saved as chart for reference – a colour coach. The problem I ran into with those, is that I didn’t have all of the colours being referenced.
“I’ll make my own colour coach!” I declared. I love a bit of DIY. With the colours I have, I shall match up combinations that go together and save them as digital images, maybe print them out, maybe print out a template and stamp with the actual ink colour. But when I get new colours… how do I keep that updated? Will I actually look through all those combinations as a useful reference? I started to give up…
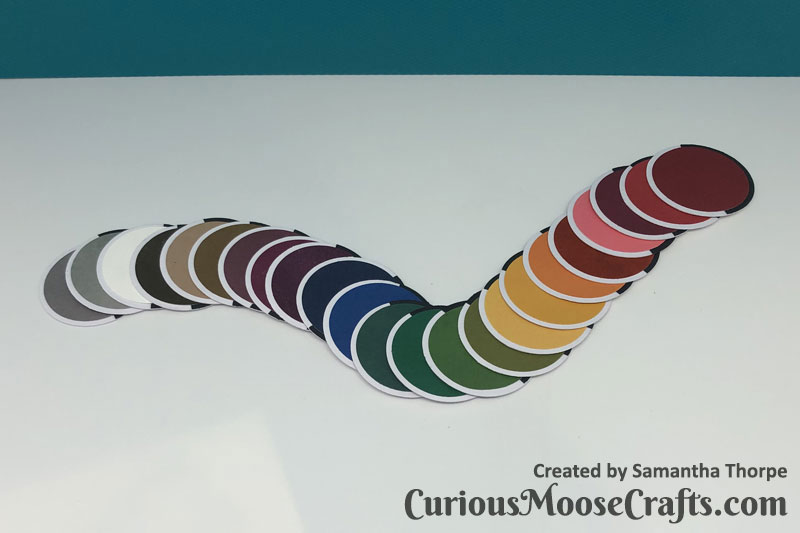
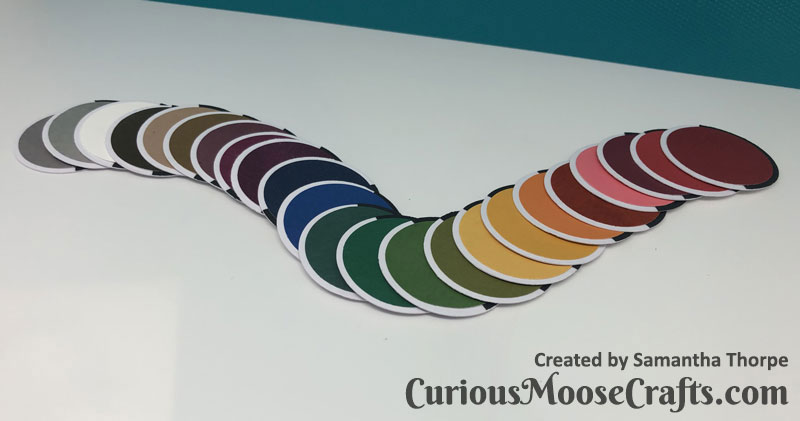
So I took it back the questions I asked myself and realised I don’t need sets of colours. I’m quite happy matching colours add hoc, it’s just the reference I need. A plan was hatched and these colour match disks are the outcome.
I have a disk for each ink colour I own. They’re small and I keep them within reach by my desk. I’m going to make a little holder for them but for now I have them in a little IKEA spice jar.
How to make them
- Super easy. Stamp your ink onto the paper you use the most – for me Whisper White. I used a solid stamp, but you could just stamp directly onto the paper.
- Punch or cut your inked swatches (once dry). I used a circle punch but you could cut easily cut into squares if you needed.
- Cut out your base on white cardstock – a little bigger than your swatch size. Again, I used a punch but slightly larger.
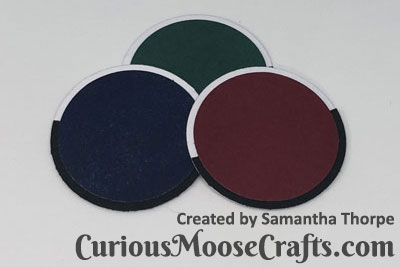
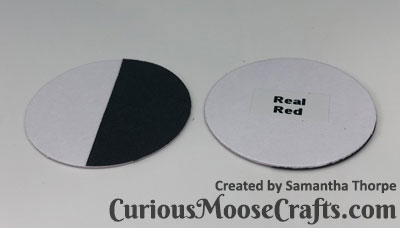
- I decided my base was going to be half black and half white, so that I could also tell how the individual colours looked against each. You could just use white though. If you want to do half black, cut out the same size as your white base and then cut it half. Stick this to your white base so it’s 50/50.
- Stick on your ink swatch.
- Label the back (or write on it) with the name of the ink colour. I nabbed my husbands label making machine 😀
- Repeat! Well, obviously much easier to batch up each step. But you know what I mean. Get all your colours done and your reference colour disks are ready.
Picture below (on the left) showing both sides of the disk base, just needs the colour swatch to be complete.
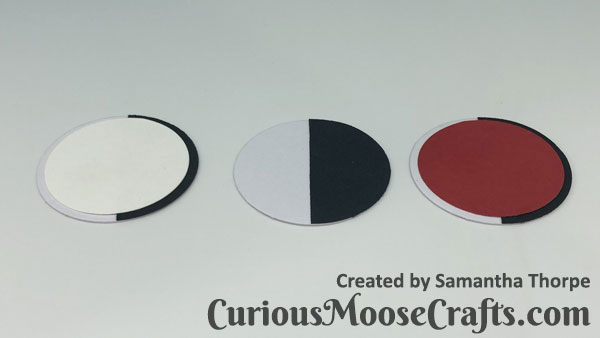
I actually did an extra disk in the Whisper White cardstock as an extra reference. You can see the white card, prepped base and a colour inked example in the right picture above. While I was making these, I prepped a chunk of extra bases so that when get new colours I have less to do.
Using them
I need to make a card for a little girl I know who loves pink – what pinks do I have?
Out come the disks and I pull out all the pinks.
What colours go well with these pinks?
I pull out all the disks that co-ordinate.
What set do I prefer? They’re the winners. Time to get supplies.
I take my disks and turn them over. Voila! The name of the colours. I pull the inks from my stash and all the other supplies needed for my project, head back to my desk and crack on.
Or maybe I see an ink colour online and think oh that’s pretty, I need that, wait. Do I have it already? Or something similar? Time to refer to the colour disks. Much easier than searching through all of your actual ink collection. Assuming it’s sizable 🙂

With Stampin’ Up!, given the colours match so well you could punch out the coloured card instead of using the ink, but I wanted to be sure and I also don’t have matching card for all my ink colours… yet.
You could also stamp a pattern rather than a full colour block to get a more realistic view of how stamped images would look. My main purpose for these is to see how well the colours go together, so a block of colour works best for that.
I’ve disked up for all my SU ink collection, but I will also be creating these for my other inks such as distress oxide. For those I’ll just add the brand to the label so they’re easily identifiable.
I’m also doing something similar for my Nuvo drop collection, so will share the results of that soon.
For demonstrators reading, I thought it might be nice to send these to customers for the ink pads they’ve purchased. That way it builds up their collection and is an inexpensive extra from yourself. You can then send samples of the new In Colours, or other colours they haven’t bought yet and you think they might like or would coordinate well with their existing collection. Nice little samplers/nudgers. 🙂
Thanks for reading and come back soon for more tips and inspiration.
Thanks,
Sam
Example Product List
 |  | |
 |  |


One comment