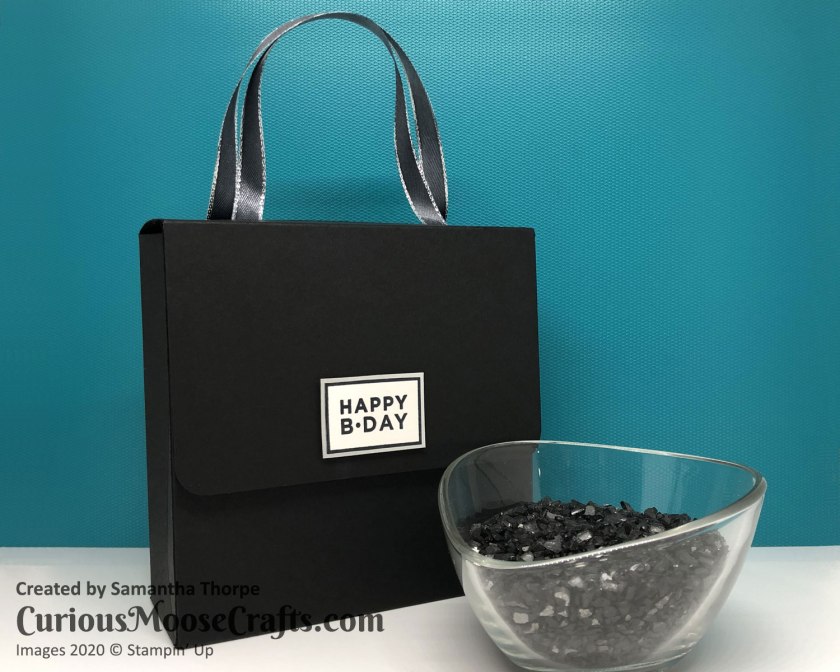
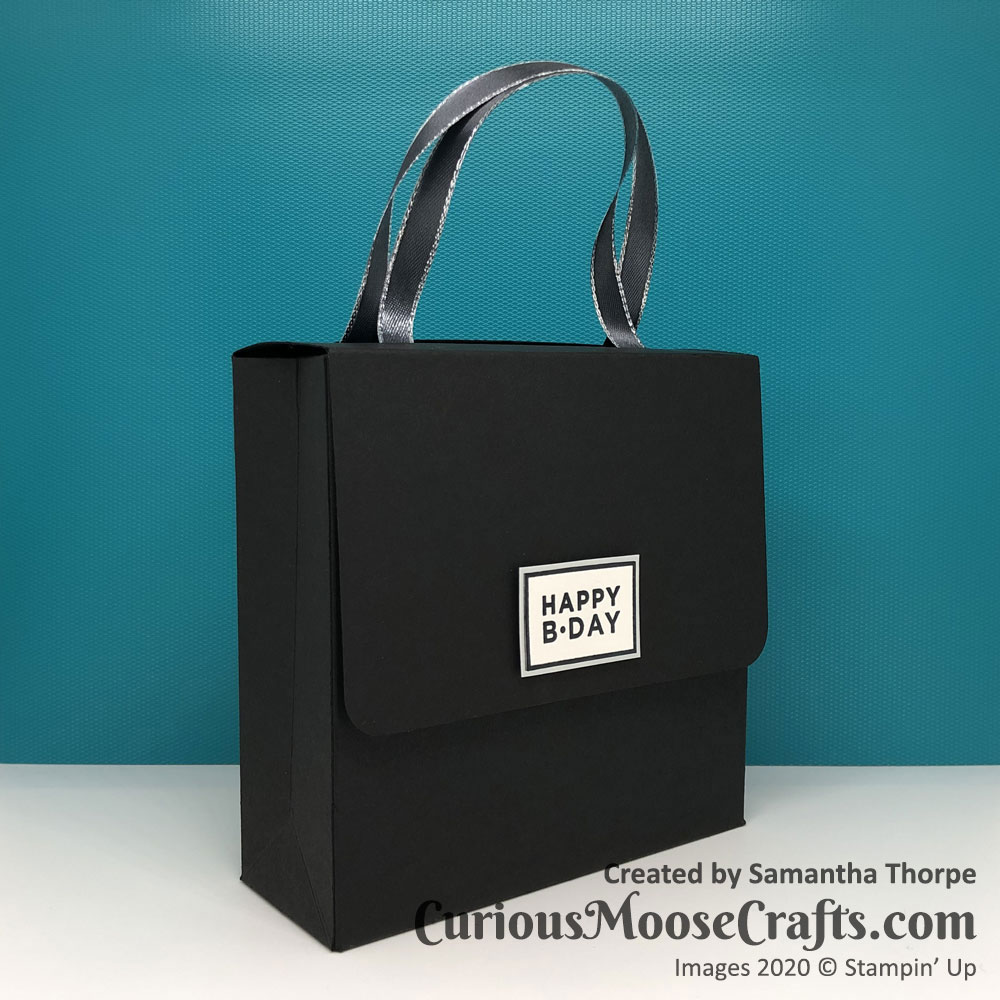
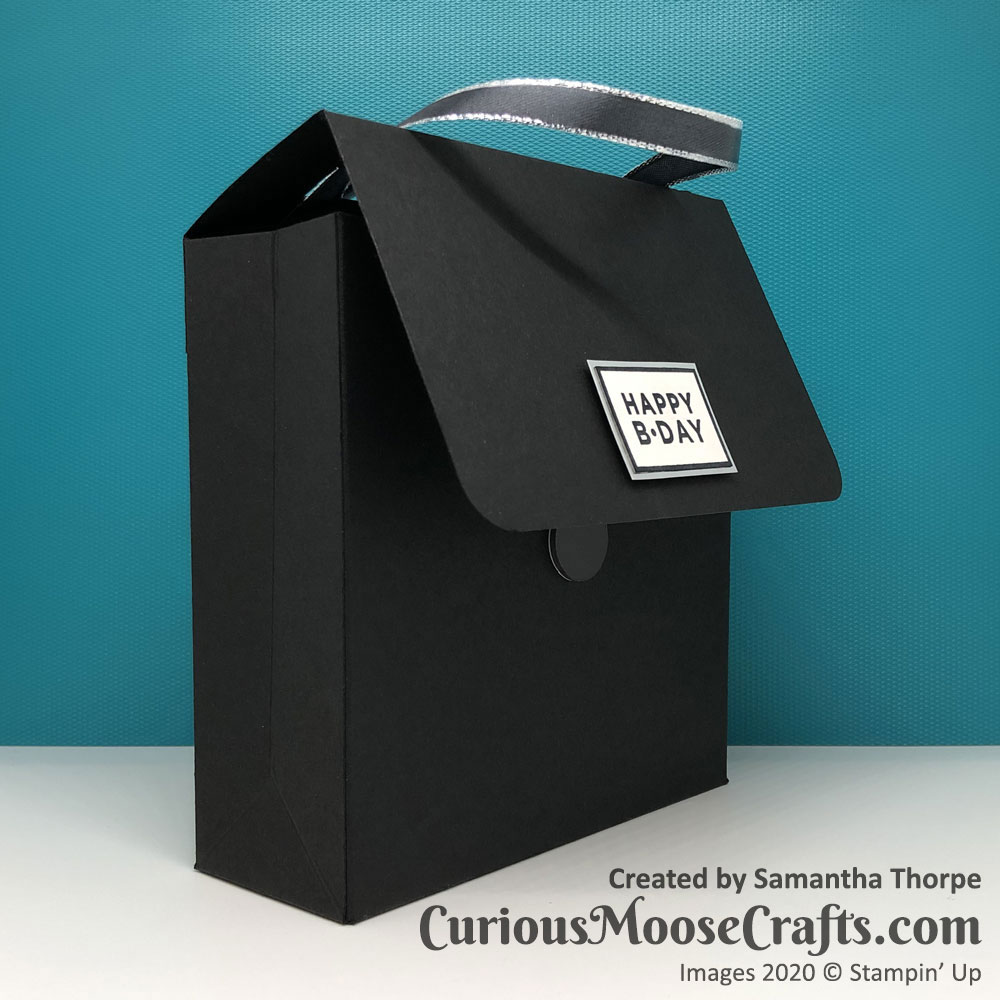
As soon as I saw the Happiest of Birthdays stamp set in the annual Stampin’ Up! catalogue, I knew I wanted to make this project. This stamp design just immediately made my brain go “handbag label”.
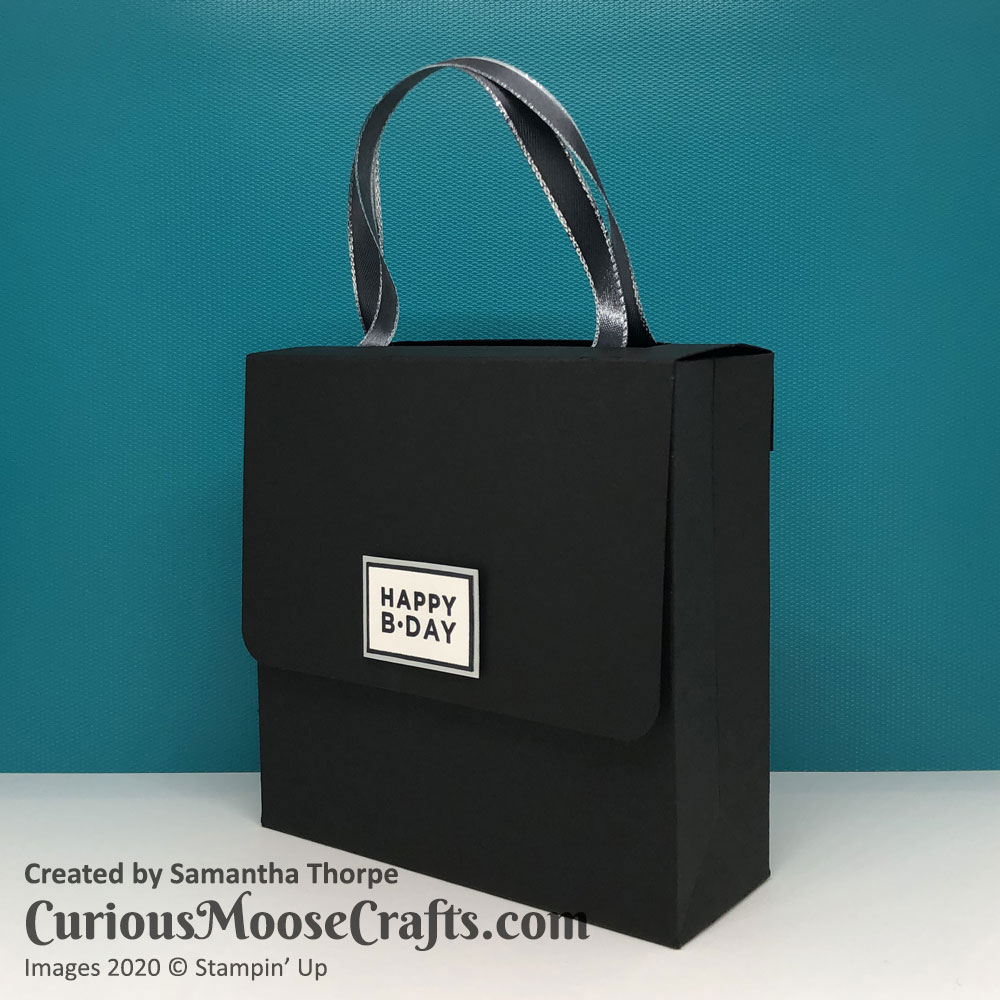
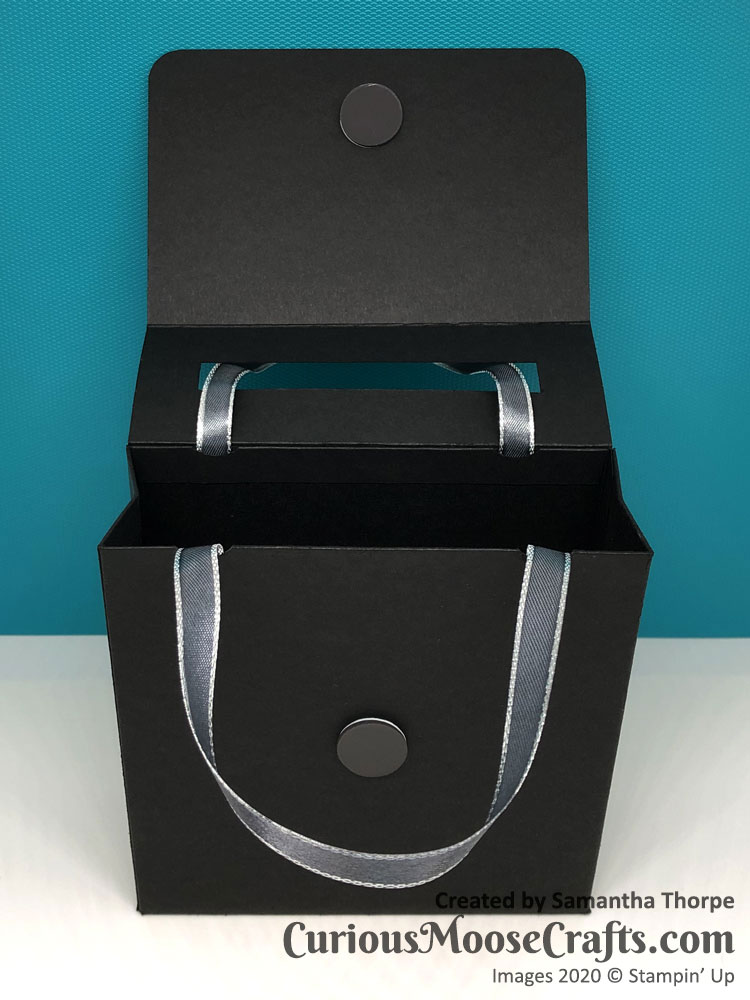
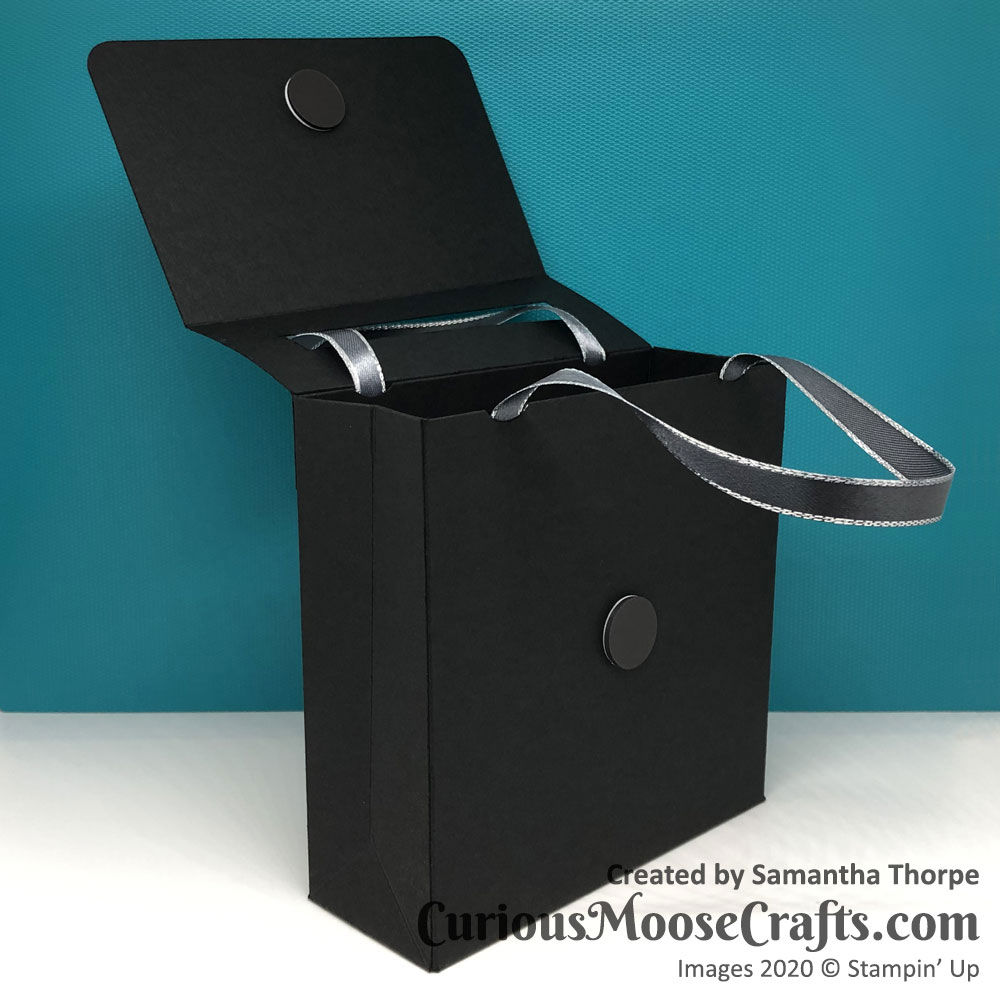
The best news? How easy it is to put together! I’ve created some pdf templates you can download below with all the measurements. A and B side by side create the gift bag. C is the flap over the top to turn it into a handbag. Using a trimmer makes cutting out the section for the handles super easy.

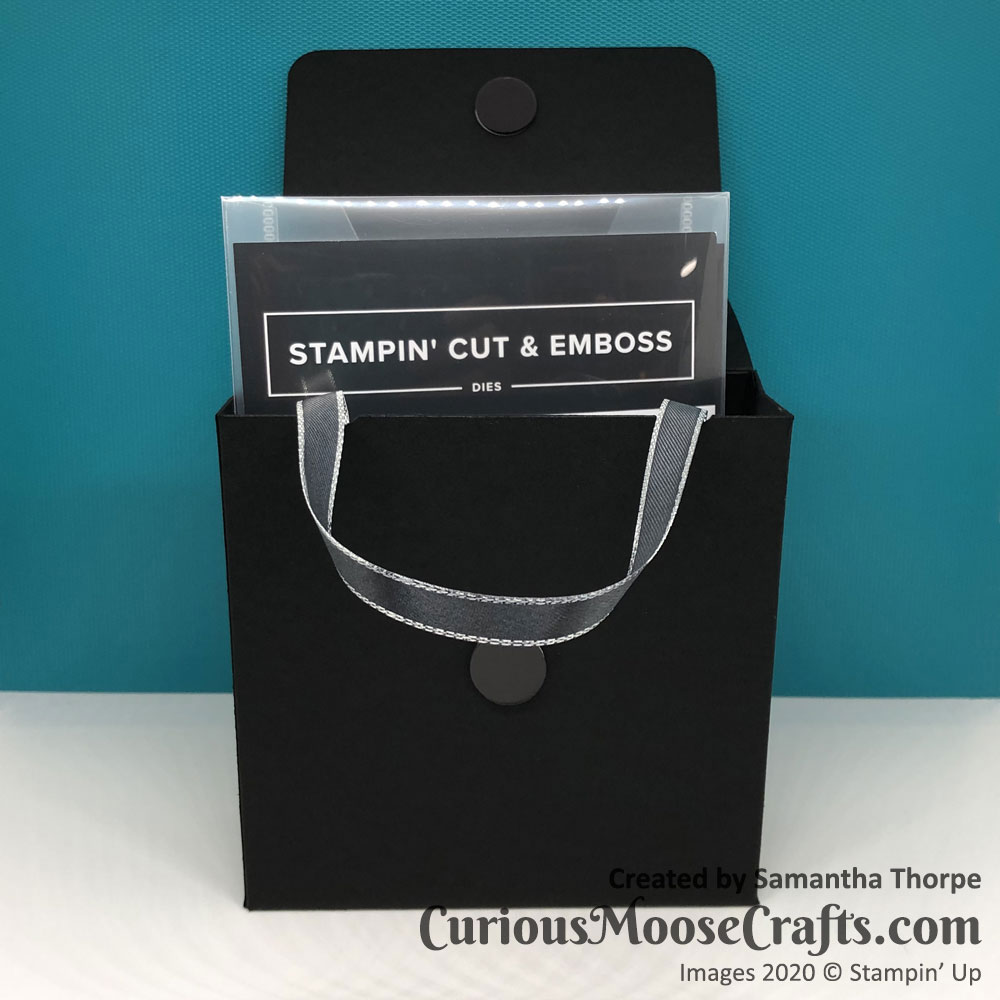
The inside of the box is 5-1/2″ x 5-1/2″ x 2″. So plenty of space to fit lots of goodies. To show some scale I popped a small Stampin’ Up! Dies set in.
Supplies
8″ x 8″ black cardstock (2, 1 for A and 1 for B)
Score 1/2″ and 6″ on both sides.
5-1/2″ x 6-1/2″ black cardstock for the top flap
Score 1″ and 3″ and cut hole for handles as shown on the pdf.
10″ ribbon (2, 1 for each handle)
I used silver metallic edged white ribbon and coloured black with my Stampin’ Blends as its just the right width and texture.
Magnets or velcro for the bag closure
I used these Stix 2 flexible magnetic discs which worked great.
See the bottom of this post for the full list of supplies used (except magnets).
PDF Templates
If you want to take it further, this is the foldable version:
I hope you like it and give a go yourselves. Tag me @curiousmoosecrafts so I can see your creations!
Thanks for reading,
Sam xx
")


